Before & After!! A mosaic makeover!!

Before and after! A stool makeover!

Some time back, when we got the house painted, the contractor used a wooden stool from our furniture.. and left it in such a messy state, that it used to take an effort to look at it and not feel disgusted. Poor piece of furniture must have suffered loads. (sigh!!)

One fine day, when the stool was lying in the corner of the dump-area of the house, I started wondering if only I could change its appearance and make it a piece of art. My brain started whizzing with all its might and came up with a design from the scrap items available easily at my home.

My dear hubby has got a beautiful, small workshop where he gets custom ceramic tiles designed, printed and processed. There are always scrap pieces of ceramic leftover taking their space in the workshop's frontyard. So I decided to a little mosaic design on the stool.

I started exploring the scraps and came up with a simple design of spiral with a light contrast background.

I sandpapered entire stool first and then pencil-sketched the design directly on the top.

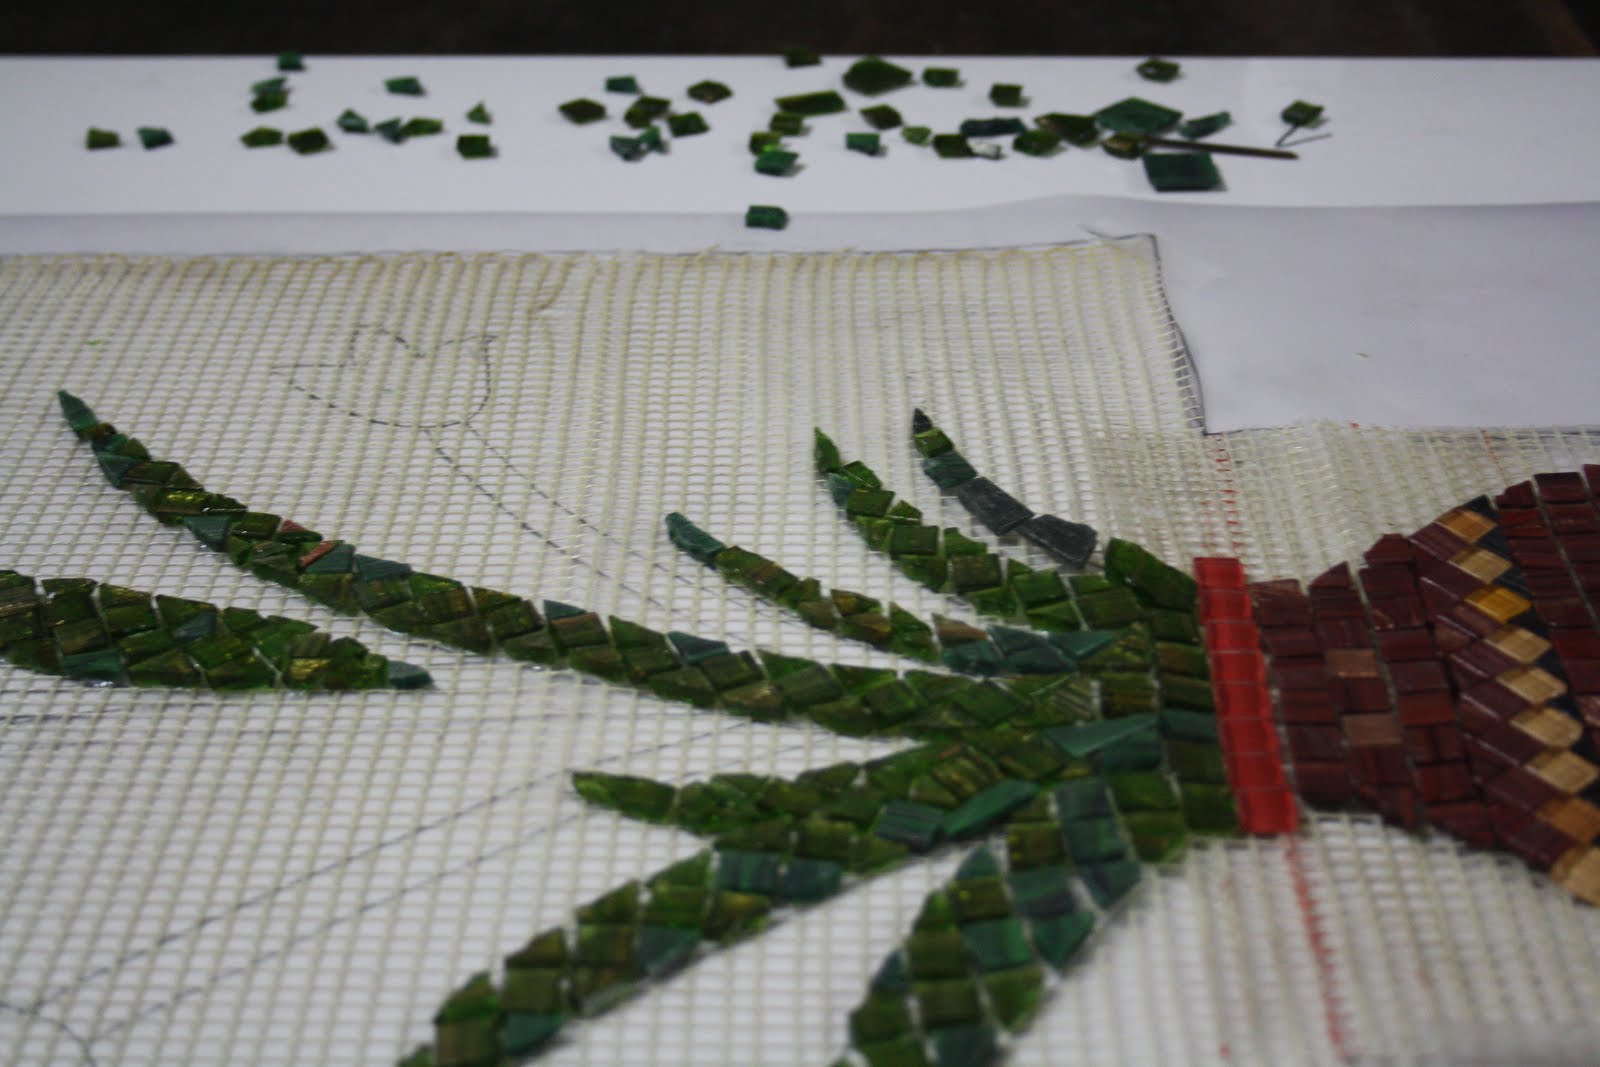
The pieces of tiles were cut and pasted with glue adhering the sketch.
The inner design was done first and then the background.

After the pieces were set properly, I applied the cement mixture on to the pieces. The slurry had to seep into all the rough edges and gaps and then it was left to dry for about 10 hours. About midway through the drying process, I sponge-wiped the extra cement layer off the top of the ceramic pieces.

After the top was ready, the legs were wood-polished.

A closer look of the mosaic design!


And here is a before and after look!


So, yet another mosaic piece is ready to add to my collection!!!
Mosaic inspiration is still on and who knows what could be done next!! Tip Junkie handmade projects

Ceramic wall plaque

This one has stayed longer than others!!!! My ceramic love has not only stayed longer than other things that I've started doing in the past.. but also it is growing by each passing day!!
The fact that my ever-growing body is not allowing me to do much of it, I still managed to put together a sample plaque along the lines of Italian name plaques.

The photo of the raw sample is -


And the photo of the finished sample is -

Ceramic colours can be soo tricky and you are never sure what will the final result look like till you actually see it!! Same thing happened with me while working on this but still I was pretty satisfied with the end result. I think thats the beauty of handmade.. the runtime inspirations make each work so unique!!

As I've already told many of my friends, another mosaic piece is ready and I'll post it soon in the next blog. Till then keep the inspiration flowing!!!

Mosaic art

More renovation at home means more ideas cluttering my brain!!!
So when it was time to do the main door, I went with my all-time-motto of adding a handmade touch to it.
I can't even remotely think about doing anything to do with carpentry work because the nightmares of using the saws and drills during the engineering time was enough to put me off it!!
So I decided to go with embedding a ceramic piece into the door surface.

For the first time, I tried using the mosaic technique and now I'm in love with this. Mosaics is such a beautiful way of creating a kind of handmade digital effect to any picture or design.
Its no doubt a very time-consuming process and the intricacies of it can baffle a beginner like it did to me.

A brief process was -
1) I traced the design that I wanted to do on a piece of tracing paper. I actually drew it because the dimensions had to be precise.
2) Then I stuck the tracing paper on the back of a mosaic net that was cut to the dimensions.
3) On the mosaic net, I started sticking the pre-cut mosaic pieces in the colours of my choice.


Here are some more photos of work in progress -


After the pieces were set properly, I applied the cement mixture on to the pieces. I let them seep into all the rough edges and gaps and left it to dry for about 10 hours. About midway through the drying process, I sponge-wiped the extra cement layer off the top of the ceramic pieces and....

The finished mosaic piece looks like this -


So every time I enter our house, I can see he handmade mosaic piece waving out to me and inspiring me to make more of mosaic art on various other surfaces!! Who knows, in a few years, I would make a complete house out of mosaics!!!

Finished level 1 - Pottery

The finished objects of my pottery love has come into existence!!!
The jewelry box, the vase and the bowl are all here.


I actually did not mean to paint them all red.. but somehow they turned out so.
Look at the crackle finish on the bottom of the bowl.. Isn't it lovely?

My next project is a ceramic charms mobile to hang over the crib or in the window.
I've taken print-outs of various charmy things like star, heart, butterfly, flower, cupcake, sun, moon and cut them out. Using the cut-outs I'm in the process of making small ceramic charms. Lets see how it turns out. Till then.. keep getting inspired!!!

Love,
Prachi